
So, you’re building a PC; with modern components running faster (and hotter) than ever, you’ll need at least one fan. Searches reveal thousands of models bragging about their CFM or noise levels or bearing type. How do you cut through the marketing jargon? This guide for beginners should demystify computer cooling!
Size and Mounting
The first concern on your checklist should be fan size. Most modern cases use 80, 120, or 140mm fans, but some cases and CPU coolers use everything from 40 to 200mm. Your case should have sizes listed in the manual or online; otherwise, you can measure from mounting hole to mounting hole.
Next up, consider how you’re mounting the fan: vertically (on one of the walls of your case) or horizontally (on the top or bottom of your case). Vertically mounted fans are common for intake and exhaust, but many new cases allow for horizontal mounting as well. The orientation has a direct effect on what type of bearing you choose.
Bearing Type
The bearing is the small piece (or pieces) of metal that sits between the spinning part of the fan and the stationary frame of the fan. If you’ve ever had a fan that rattled, it was probably the bearing(s) you were hearing. As the bearing is the mechanism your fan spins on, it is very important.
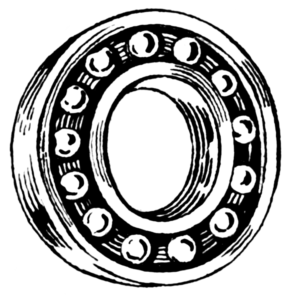 At the bottom of the barrel, you have Sleeve Bearings, which are affordable but prone to noise. Sleeve bearings will also wear out prematurely if mounted horizontally. Moving further up the list you’ll find:
- Rifle Bearings: also called ‘fluid dynamic bearings,’ such as this Arctic. Perfectly adequate for most case fans, and the cheapest solution for long-term horizontal mounts.
- Ball Bearings: expensive, heavy-duty fan bearings for tough environments like servers or serious overclocking, where the fans will be attaining high speeds much of the time.
- Maglev Bearings: featuring a balance of power, reliability, and minimized noise, maglevs are ideal for radiators and high-performance environments. Corsair’s ML120s are a popular example.
Fan Application/Purpose
Most computer fans are designed with one of two priorities at the top: airflow or static pressure.
Airflow fans are designed to evacuate as much air as possible from one place to another, usually in and out of your case. These fans have little in their way aside from a grille or light mesh, so the air moves freely and easily. Airflow-optimized fans are distinguished by a high CFM (Cubic Feet per Minute, which refers to rate they can move a given volume of air). An example would be the monstrous 78.1 CFM of this Fractal Design model.
 Static pressure fans are designed for pushing air through obstacles. For PC builders, that obstacle is usually a radiator or thick CPU heatsink. Static pressure fans are standard on almost all radiators, and are essential for maintaining optimal cooling on such units.
For most PC builders—those not overclocking or running exotic cooling—it is most important to choose a quality fan, focused on long-term reliability versus specialized application. Many fans, especially high-end models from Noctua and Corsair, are all-around performers that won’t disappoint you.
Fan Header Connection Types
With few exceptions, computer fans come in either 3-pin or 4-pin varieties. This means that the wire which attaches the fan to the motherboard has either three prongs at its connection point, or four.
The connectors on 3-pin models carry three signals: power, ground, and a speed sensor. These models can only be sped up or slowed down by varying the DC current on the power pin, which is clunky or impossible on many motherboards. As a result, 3-pin fans often either run at full speed at all times or only achieve lower speeds through undervolting, which makes them both louder and more prone to wearing out.

Photo by bengt-re
The fourth pin on 4-pin connectors allows for PWM, or pulse width modulation. PWM adds another electronic signal that directly controls fan speed. With PWM, you can set smooth, automated fan routines based on temperature so that your PC is quiet at idle, and only ramps up when things get toasty. Do note that 3-pin fans will work in 4-pin motherboard headers (and typically vice versa), but you will lose PWM features.
One more thing: make sure you buy a 12V fan for a desktop PC. 5V fans exist for routers, switches, and small computers like the Raspberry Pi; plugging one into your motherboard may fry it!
RGB and Fan Controllers
Who doesn’t love RGB? A lot of people… but for those who do, you probably want RGB fans. Most RGB fans come with two plugs, one for power and one for RGB addressing. You can plug both into the appropriate places on your motherboard. Controllers like this Cooler Master model simplify the process by allowing for daisy chaining multiple RGB fans.
Of course, there are plenty of fans with non-controllable colored lighting, and PWM versions can be controlled by any basic internal fan controller. Some, like the Corsair Lighting Node Pro, integrate both RGB and speed control into a single device.
Conclusion
If the details confuse you—or if you just want an adequately cooled PC with minimal headaches—focus on reputable brand names (including Arctic, be quiet!, Cooler Master, Corsair, CryoRig, Fractal Design, Noctua, and Thermaltake) and good review scores. But if you want to dig deep into fans and PC cooling, the rabbit hole is quite deep. Go nuts!